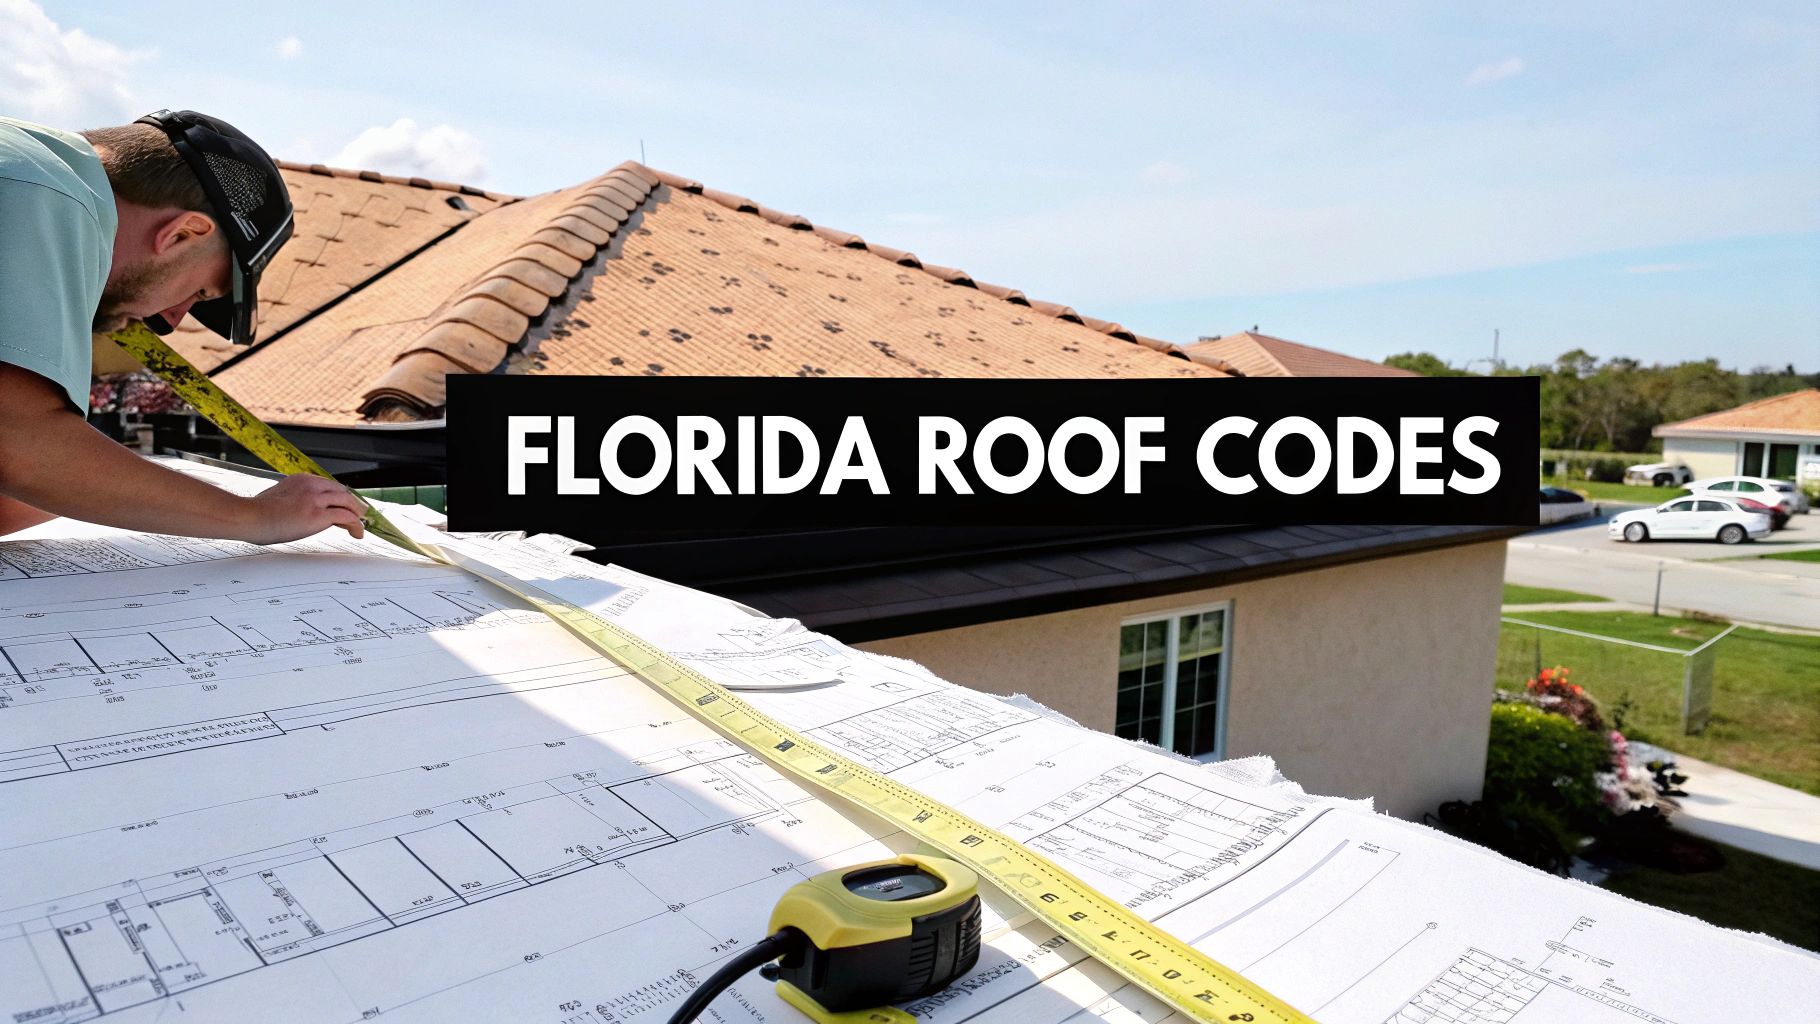
Navigating the florida building codes for roofing can feel complex, but it’s essential for protecting your biggest investment. These aren’t just arbitrary rules; they are a set of proven safeguards, born from Florida’s history with severe weather, designed specifically to keep your home and family safe during a hurricane. This guide provides actionable insights to help you ensure your roof is built right.
Why Florida Roofing Codes Are Among the Toughest
The story behind Florida’s strict roofing codes is one of wind, water, and hard-learned lessons. Before 2002, a patchwork of local regulations left many homes vulnerable. This flawed system was tragically exposed in August 1992 when Hurricane Andrew, a Category 5 storm, devastated South Florida.
The aftermath revealed a systemic failure of residential roofs. An estimated 60,000 homes were destroyed, largely due to weak roof-to-wall connections, poorly attached sheathing, and shingles that peeled away under hurricane-force winds. The storm served as a brutal, real-world lesson: the old way of building was simply not enough.
The Birth of a Statewide Standard
The destruction from Andrew was a critical wake-up call. It highlighted the urgent need for a single, high-standard building code to protect the public. In response, Florida established the first statewide Florida Building Code (FBC) in 2002.
This wasn’t just an update; it was a fundamental shift in how roofs are constructed. The code forces contractors to treat the roof as a single, integrated system—a suit of armor for your home. Every component, from the nails securing the deck to the underlayment and shingles, must work together to form a unified shield.
The core principle of the modern Florida Building Code for roofing is resilience. Your actionable takeaway is to hire a contractor who understands this, ensuring your roof serves as your home’s primary defense against hurricane-force winds and torrential rain.
Your Roof Is Your First Line of Defense
Adhering to these codes is more than a legal formality; it’s a direct investment in your home’s survival during the next major storm. A code-compliant roof provides tangible benefits when it matters most.
- Actionable Tip for Wind Resistance: Ask your contractor to explain the specific nailing pattern they will use to combat wind uplift, as mandated by the FBC for your home’s location.
- Actionable Tip for Water Intrusion: Verify that your roofing proposal includes a self-adhering secondary water barrier, not just standard tar paper. This is a critical backup layer that keeps your home dry if the primary roof covering is damaged.
- Actionable Tip for Structural Integrity: Confirm that the roofing plan includes reinforcing the connections between your roof and walls, a key requirement for preventing catastrophic failure.
In Florida, cutting corners on roofing is a high-stakes gamble. A poorly installed roof is a major structural vulnerability. By understanding the “why” behind the strict florida building codes for roofing, you can hire a contractor who prioritizes compliance, ensuring your biggest investment is protected by a roof built not just to last, but to endure.
Decoding Key Florida Roofing Code Requirements
The Florida Building Code (FBC) is a dense, technical document, but you don’t need to be an engineer to understand its core principles. Mastering the basics empowers you to have productive conversations with contractors and ensure your home is properly protected.
The FBC exists because of past disasters. Before its statewide implementation in 2002, inconsistent local codes left homes vulnerable, a fact tragically proven when Hurricane Andrew destroyed an estimated 60,000 homes. This led to a uniform code, meaning every roofer, from Miami to Pensacola, must adhere to the same non-negotiable safety standards. While the FBC provides a statewide baseline, deep local knowledge remains crucial, a concept applicable across trades, as noted in discussions on understanding localized building codes.
The “Rain Jacket” for Your Roof: Underlayment Rules
Think of your roof’s underlayment as a high-tech rain jacket. Even if your top layer (the shingles or tiles) gets damaged, the waterproof layer beneath is what truly keeps you dry. The FBC mandates a high-quality underlayment as a secondary water barrier for this very reason.
This is your last line of defense against water intrusion when a storm damages your primary roof covering. Modern codes often require self-adhering membranes that seal around each fastener, a significant upgrade from old-school tar paper.
Actionable Tip: When reviewing a roofing estimate, look for the term “self-adhered underlayment” or “peel-and-stick.” If you don’t see it, ask the contractor why they aren’t using it, as it’s a key requirement in the florida building codes for roofing.
The Infamous 25% Rule Explained
The “25% Rule” is one of the most critical and misunderstood parts of the code, determining whether you need a simple repair or a full roof replacement.
Here’s the rule of thumb: if more than 25% of a single roofing section is damaged or requires repair within a 12-month period, the entire section must be brought up to the current building code. For most homes, this means replacing that entire slope of the roof.
Actionable Insight: The 25% Rule is a safety mandate, not a suggestion. It prevents the dangerous practice of repeatedly patching a failing roof. If a roofer suggests patching a 30% damaged area, they are advising you to violate the code and put your home at risk. This could also lead to future insurance claims being denied.
Understanding Chapter 15 of the FBC
When roofers refer to “the code,” they are typically talking about Chapter 15 of the Florida Building Code, Building. This chapter is the definitive guide for all roofing in the state, covering everything from materials to installation methods.
Here’s a practical breakdown of what Chapter 15 dictates:
- Roof Assemblies: Sets rules for the entire system—deck, underlayment, flashing, and covering.
- Weather Protection: Details how the roof must shed water and resist wind, including specific underlayment requirements.
- Performance Requirements: Specifies how to fasten materials to combat hurricane-force wind uplift.
- Fire Classification: Mandates fire-rated materials to prevent fires from spreading.
Actionable Tip: Use this knowledge to vet contractors. Ask them, “How does your proposal meet the specific fastening requirements for my home’s wind zone, as outlined in FBC Chapter 15?” A qualified professional will provide a clear, detailed answer.
Understanding Wind Load and Roof Uplift
When a hurricane strikes, wind doesn’t just push against your walls; it creates a powerful lifting force called wind uplift that tries to peel the roof off your house. Understanding how the florida building codes for roofing are designed to combat this force is essential for every homeowner.
Think of your roof like an airplane wing. As high-speed wind flows over the top, it creates a low-pressure area, generating lift. Simultaneously, wind entering your attic through soffits pushes up from below. This combination of pulling from above and pushing from below can tear decking from the rafters.
How The Code Calculates Your Home’s Risk
The Florida Building Code uses a sophisticated system to calculate the specific forces your roof must withstand. This calculation, known as design pressure, is customized for your home based on several key factors.
Your home’s location is the most significant factor. A home on the coast in Miami-Dade County faces much higher wind forces than one inland near Orlando. The code divides the state into different wind speed zones to account for this.
Other factors influencing your roof’s required wind resistance include:
- Building Height: Taller homes are exposed to faster winds.
- Roof Shape: Complex roofs experience wind forces differently than simple gable roofs.
- Surrounding Terrain: A home in an open field faces more wind than one in a dense subdivision.
This detailed approach ensures your roofer uses the right materials and, most importantly, the correct fastening schedule. This is a precise plan dictating the type, number, and pattern of nails needed to secure your roof against the specific uplift forces calculated for your property.
Figuring Out Your Wind Zone
The map below provides a general overview of wind speed requirements across Florida. Use it as a starting point to understand the baseline forces your roof needs to be built to handle.
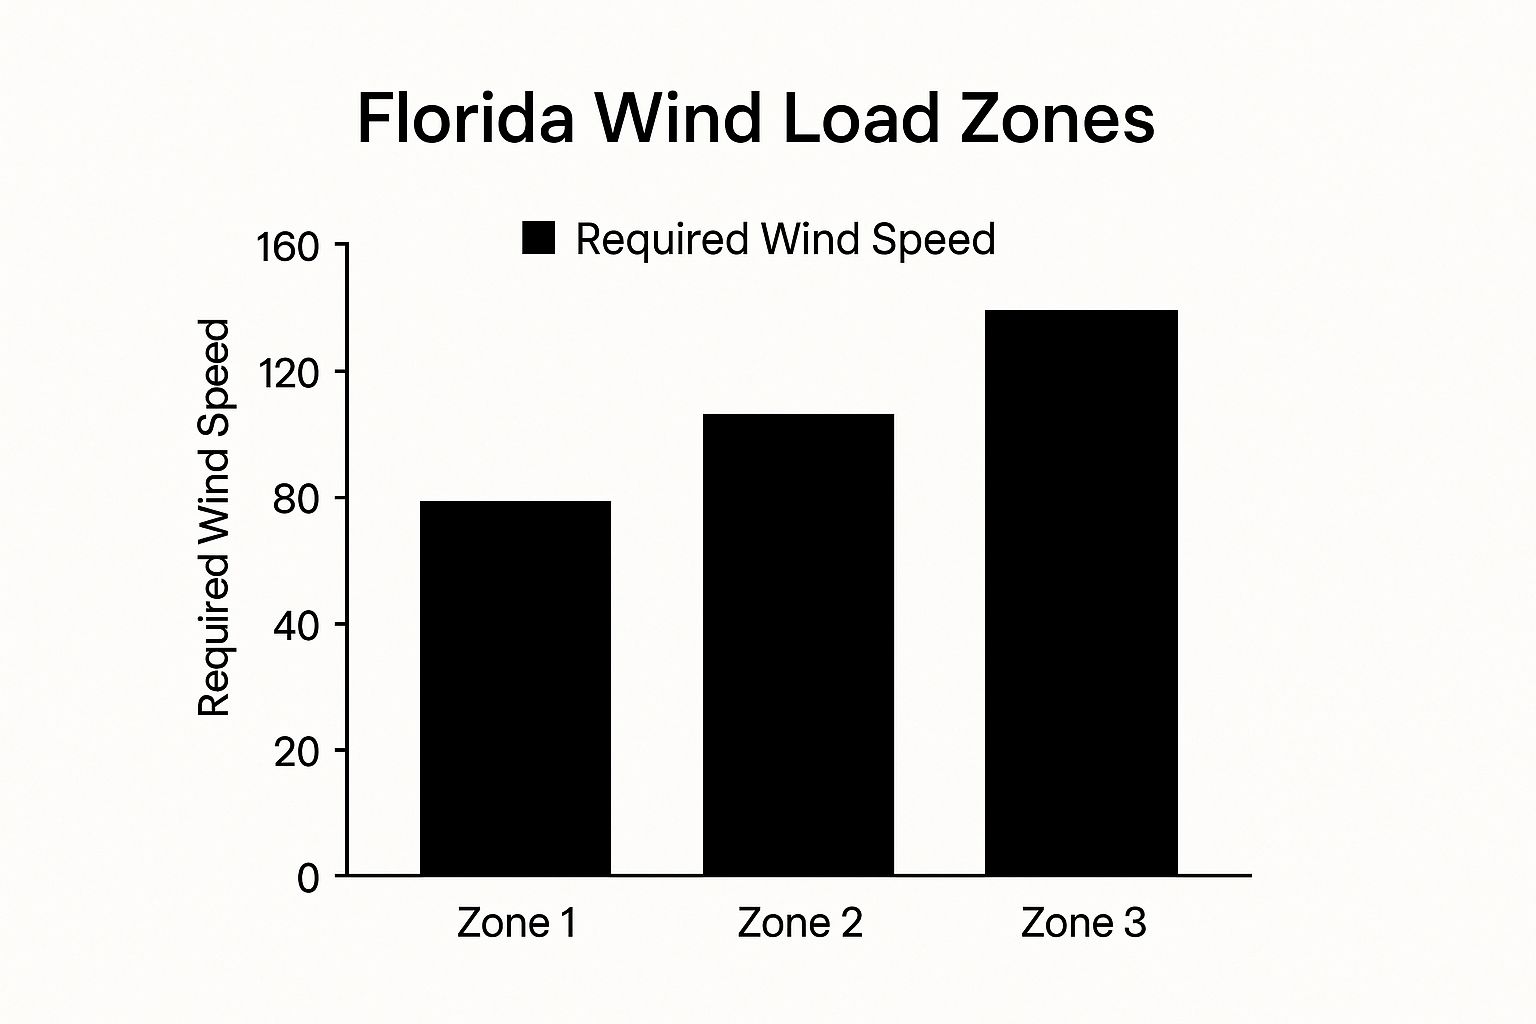
As you can see, required wind resistance increases significantly in coastal areas and South Florida, which are designated as High-Velocity Hurricane Zones (HVHZ).
Florida Wind Speed Zones and General Roofing Requirements
| Risk Category II Wind Speed (MPH) | Typical Geographic Areas | General Roofing Requirement Focus |
|---|---|---|
| 120-140 MPH | Northern and Central Florida (e.g., Jacksonville, Orlando, Gainesville) | Enhanced fastening patterns, but less extreme than coastal areas. |
| 150-160 MPH | Coastal areas outside of the HVHZ (e.g., Tampa Bay, Space Coast) | Stronger underlayment, closer nail spacing, and corrosion-resistant fasteners. |
| 170+ MPH | High-Velocity Hurricane Zone (HVHZ) – Miami-Dade and Broward Counties | The most stringent requirements: product-specific approvals, impact-rated materials, and intensive inspection schedules. |
This table illustrates why a roof in Miami is constructed so differently from one in Ocala.
Key Insight: Your home’s exact address determines its wind load requirements. A professional roofer will use the American Society of Civil Engineers’ standards (ASCE 7) and the FBC to calculate precise design pressures for your roof’s corners, edges, and main field, as each area handles wind differently.
Putting This Knowledge to Work for You
So, what should you do with this information? Use it to protect your investment and hold your contractor accountable. When reviewing a roofing proposal, ask specific, informed questions instead of just, “Is it up to code?”
Actionable Questions to Ask Your Roofer:
- “What is the required design pressure for my roof, and can you show me the calculation?”
- “Can you point out the specific fastening schedule for my home’s wind zone in the plans?”
- “What type of underlayment are you using to meet the secondary water barrier requirement for our area?”
A true professional who understands the florida building codes for roofing will welcome these questions and provide clear answers. Their ability to explain these details is a strong indicator that they are committed to building a roof that is not just “legal,” but truly storm-resilient.
Navigating the Roofing Permit and Inspection Process

While a building permit might seem like bureaucratic red tape, in Florida, it’s your most powerful tool for quality control. It transforms the complex florida building codes for roofing from an abstract rulebook into an enforceable checklist that protects you from substandard work.
Think of the permit and inspection process as your personal quality assurance team. It ensures every nail, shingle, and strip of flashing is installed according to legal safety standards. This process is your first and best line of defense against corner-cutting.
Your Contractor’s First Step: The Permit Application
Before any work begins, your contractor is legally required to obtain a roofing permit from your local building department. This is a comprehensive submission that details the entire project and proves the new roof will meet all current code requirements. To understand what’s involved, it’s helpful to review an ultimate building permit checklist for major home projects. This step is non-negotiable and forces the contractor to plan the job correctly from the start.
The permit application typically requires:
- Detailed Scope of Work: A complete description of the job, from tear-off to final installation.
- Product Approvals: Proof that materials (shingles, underlayment, etc.) are approved for use in Florida and meet your home’s specific wind-load requirements.
- Engineering Plans: May be required for complex projects or homes in High-Velocity Hurricane Zones (HVHZ).
Once issued, the permit must be displayed on your property, often in a front window or posted in the yard.
The Critical In-Progress Inspections
This is where the permit process truly demonstrates its value. A city or county inspector will visit your property at key stages to verify the work meets code. Work must halt until the inspector approves that stage.
Actionable Takeaway: Stay involved in the inspection process. Ask your contractor for the permit number the day it’s issued. You can use that number on your local building department’s website to track the inspection schedule and see the results for yourself in real-time.
These inspections ensure mistakes aren’t covered up. The two most important are:
- Roof Deck Nailing (Sheathing Inspection): This occurs after the old roof is removed but before the new underlayment is installed. The inspector verifies the nailing pattern is strong enough to meet wind uplift requirements, ensuring the foundation of your roof is secure.
- Dry-In (Underlayment Inspection): The inspector returns to check the installation of the secondary water barrier, confirming the correct materials were used and that it’s installed flawlessly.
If an inspection fails, the contractor receives a correction notice and must fix the issue before work can continue.
The Final Inspection: Your Proof of Compliance
Once the roofing is complete, a final inspection is scheduled. The inspector conducts a final review of the entire project, checking the final roof covering, ventilation, and other finishing details.
Passing the final inspection “closes” the permit. This is your official, documented proof that your new roof complies with the florida building codes for roofing. This final report is an invaluable document. Keep a copy for your records, as you’ll need it for insurance purposes (especially for wind mitigation credits) and if you decide to sell your home. It’s the ultimate certification that the job was done correctly.
How Major Storms Evolve the Building Code
The Florida building codes for roofing are not a static document. Think of it as a living set of rules that constantly adapts and improves, with its most important lessons learned from the aftermath of major hurricanes.
This process is built into a mandatory review cycle, ensuring the code keeps pace with new materials and, more importantly, the harsh lessons taught by severe weather. This is why a roof installed today is significantly safer and more resilient than one built just a decade ago.
Learning from the Storm
After every major storm, teams of engineers and building professionals perform forensic analyses in the hardest-hit areas. They investigate why some roofs failed while others survived, identifying specific weak points like nail types, underlayment performance, or decking attachment methods.
This investigative work is invaluable. The patterns they identify—especially after destructive hurricane seasons like 2004—lead directly to life-saving updates in the next edition of the building code.
Actionable Insight for Homeowners: Understand that code changes are not arbitrary; they are direct responses to real-world failures that destroyed homes. These updates are practical fixes designed to prevent the same disasters from happening again, better protecting your property and family.
The findings from these investigations are presented to the Florida Building Commission, the entity responsible for updating the code. This cycle of storm damage, analysis, and improvement drives roofing safety forward.
The Three-Year Update Cycle Explained
The Florida Building Code is reviewed and updated every three years, incorporating new building science, materials, and lessons learned from recent storms. For example, after the 2004 and 2005 hurricanes, significant changes were implemented, including stronger requirements for fastening roof decks to resist high winds and making secondary water barriers a standard mandate. You can see the details of these specific code updates and their impact on construction.
This regular cycle has given us some of today’s most crucial roofing protections:
- Enhanced Fastening Schedules: Specific, non-negotiable nailing patterns proven to prevent roof decking from being ripped off.
- Secondary Water Barriers: The now-required self-adhering “peel and stick” underlayment that protects your home’s interior even if shingles are lost.
- Improved Flashing Techniques: Stricter rules for sealing leak-prone areas like valleys, vents, and chimneys.
Why This Matters When Hiring a Roofer
Understanding that the code evolves gives you a powerful tool for selecting a contractor. The most important question to ask is not just “Are you licensed?” but “Are you fully trained and certified on the latest edition of the Florida Building Code?”
Hiring a roofer who isn’t current with the code is a significant risk. An outdated installation is not only illegal but also puts your home in jeopardy. It can lead to catastrophic failure in a storm and may cause major issues with your homeowner’s insurance, potentially voiding a claim when you need it most.
Actionable Step: Before signing a contract, ask the roofer to explain a recent change in the FBC and how it affects your project. Their answer will reveal their level of expertise and commitment to staying current.
Common Questions About Florida Roofing Codes
Florida roofing projects can be confusing. Between technical jargon, legal requirements, and significant financial investment, it’s easy to feel overwhelmed. This section provides clear, practical answers to common questions about florida building codes for roofing, empowering you with the knowledge to protect your home and wallet.
How Can I Verify My Roofer Is Actually Following the Code?
You don’t have to take your contractor’s word for it. The best way to ensure compliance is to actively engage with the permit and inspection process.
Your first step is to ask your roofer for the permit number as soon as it’s issued by your local building department. This number is your key to transparency.
With the permit number, you can visit your city or county’s online portal to:
- Confirm the Permit: Verify that a permit was issued for your address and for the correct scope of work.
- Track Inspections: See the schedule for critical checkpoints like the “deck nailing” and “dry-in” inspections.
- Check the Results: See if inspections passed or failed. A “passed” status is third-party verification from a government official that the work meets code.
Actionable Advice: Ask for the permit number on day one. If a contractor hesitates or makes excuses, consider it a major red flag. Another proactive step is to ask specific questions, such as, “Can you show me the product approval sheets for the shingles and underlayment?” A legitimate contractor will have this documentation readily available.
Does the 25% Rule Mean I Need a Whole New Roof?
The “25% Rule” is often misinterpreted. It does not automatically require a full roof replacement for any damage.
Here’s how it works: The rule applies if more than 25% of a single roofing section is repaired or replaced within a 12-month period. If this threshold is met, that entire section must be brought up to the current building code.
A “section” is typically one slope of the roof. For example, if a storm damages 30% of the shingles on the front slope, you cannot just patch that area. The code requires you to replace the entire front slope with a new, fully compliant system. However, if the back slope is undamaged, it likely does not need to be replaced. The purpose of the rule is to prevent endless patching of an old, failing roof system.
Is a Roofing Permit Always Required in Florida?
Yes, a permit is required for almost all roofing work. The Florida Building Code mandates a permit for any project involving the replacement or repair of more than two “squares” of roofing material (a “square” is a 100-square-foot area).
This low threshold means that nearly any job beyond a minor spot repair requires a permit, including:
- Full Roof Replacements: Always required.
- Significant Repairs: Any repair over 200 square feet.
- Material Changes: Switching from shingles to metal, for example, always requires a permit.
Actionable Tip: Never agree to work without a permit. Doing so exposes you to shoddy workmanship, fines, and significant problems when you try to sell your home or file an insurance claim. The permit is your protection.
How Do New Code-Compliant Roofs Affect My Insurance?
This is where your investment provides a direct financial return. A new, code-compliant roof can significantly lower your homeowner’s insurance premiums through wind mitigation discounts.
After your new roof is installed, hire a licensed inspector to perform a Wind Mitigation Inspection. They will complete an official form (OIR-B1-1802) that you can submit to your insurance carrier to claim your discounts.
Features that lead to the biggest savings are now standard in code-compliant roofs:
- Secondary Water Resistance (SWR): The required peel-and-stick sealed underlayment qualifies for a major discount.
- Roof Deck Attachment: The inspector will verify the modern, stronger nailing pattern, another key discount.
- Roof-to-Wall Connection: Hurricane clips or straps, often verified during a reroof, can slash premiums.
- Year of Installation: A new roof installed after the latest code updates is highly valued by insurers.
Getting a proper, code-compliant roof is not just an investment in storm protection; it’s a smart financial decision that can deliver returns for years to come.
Your roof is the single most important line of defense for your home against Florida’s wild weather. Making sure it’s built right isn’t just a good idea—it’s critical. If you have more questions or you’re ready to talk about a roof replacement in the Miami area, the team at Exact Roofing has the experience to walk you through it. For a consultation based on the latest codes and the highest quality work, visit us at https://www.exactcontractors.com.